
Page speed and user experience: two crucial ranking factors for any page, and you can make or break them both with image SEO.
Image SEO is so important that Google makes tools and documentation on the subject—but many people still ignore it. Image SEO refers to any strategies that can boost your organic traffic through the images you put on your website. From how the image complements the content on your page to the kind of image format you use, almost every aspect of an image can help you bring in more organic traffic when you use the right SEO practices.
Images can affect your SEO in three main ways: page speed, organic traffic from Google Images, and user experience. If you don’t optimize for your images properly, you risk slowing down your page load speeds, missing out on traffic from image search, and creating less engaging content for your users. Each of these problems can damage your overall SEO efforts, so if you want a well-optimized page, then you’ll need to include these 10 image SEO tips we’ve learned from Google to consistently optimize images across your site.
Tips For Improving Page Speed
According to Google, if your page speed goes from one to three seconds, 32% more users will bounce from your page. That’s why Google considers page speed a key ranking factor; it puts a high premium on user experience. Images can contribute to long load times, so use these image formatting tips to bring down your overall load speed and improve in one of Google’s key user experience metrics.
1. Pick the Right Image Format
Image formats matter: they can impact the size, quality, and usability of images across different web browsers. When it comes to image formats, there are lots to choose from, but there are three you need to know about: JPEG, PNG, and WebP. JPEG (also called JPG) and PNG are the two most popular image format choices because they have been around a long time, and they run on every major web browser.
The benefits of JPEG are:
- Smaller file sizes than PNG
- Great for photographs where the slight loss of quality during compression wouldn’t be noticeable
The benefits of PNG are:
- Perfect for larger images or more complicated digital art
- Backgrounds can be made transparent
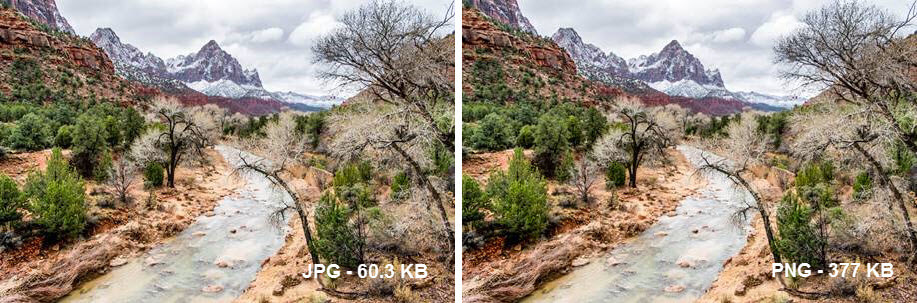
In short, JPEG images have smaller image sizes and faster load times, but in some cases, the compression of JPEG leads to a noticeable loss in image quality. In these cases, PNG is a better choice than JPEG.
However, both JPEG and PNG have been around since the ‘90s, and a lot has changed in terms of image formats since then. To take your image game to the next level, consider using WebP, a next-gen image format.
WebP has better image quality and files that can be compressed to load faster than JPEGs and PNGs. WebP is the best choice for web pages over other next-gen options like JPEG 2000 and JPEG XR because WebP is now compatible with all major browsers, including newer Safari updates.
2. Use Image Compression
Image compression helps reduce the file size of images, making the loading process quicker. The trick with image compression is finding the right balance between image quality and file size. Some changes, like reducing the total number of colors used in an image, can shrink the file size by a lot while keeping the image quality high. Other data losses may be more noticeable.
Luckily, the average content creator or SEO specialist doesn’t need to compress images themselves. Google “image compressor,” and you’ll get a list of free tools that can compress your images for you; no specialist knowledge needed. You can also check out this list of free compressors to find the tool that works best for you.
3. Implement Responsive Images
Responsive images make it so that your image sizes will adapt to whatever screen is being used by that particular user. This not only helps with user experience and mobile usage, but it also helps you decrease page speed because you’re only loading as much image as you need. For instance, according to Google, “desktop-sized images [served] to mobile devices can use 2–4x more data,” which results in slower page speeds.

Implementing responsive images will be different depending on your Content Management System (CMS). Some CMS’s, like Wix, already have responsive image elements built-in, so you don’t need to do anything at all. In the case of WordPress, it depends on the theme you are using or the plugins you’ve installed. Check the documentation on your CMS to find out how you can use responsive images on your site.
If you need to add responsive images manually, check out this guide from Google, which will walk you through the process of resizing and coding images so that you can serve the best possible image to each user, depending on their device.
When you’re done, regardless of the method you’ve used, check your work with Google’s Core Web Vitals or Mobile-Friendly test, both of which can be found on Google Search Console.
4. Try Lazy Loading
Lazy loading is a technique that allows web pages to load as users need them. So instead of loading the whole page in one go, lazy loading will load only what people need and then load other resources if users scroll down to them. You can implement lazy loading in several ways, but the easiest is at the browser level, though this only works for Chrome and Firefox users. Simply add the loading attribute to your image element and set it to “lazy.” The result should look something like this:
<img src="image.png" loading="lazy" alt="…" width="200" height="200">
Although lazy loading should help most websites, it can go wrong if you aren’t smart with your implementation. For instance, you should never lazy load any images or elements that appear at the top of the page because these are the elements that will need to load every time someone clicks on your link.
You should also include placeholder images on every image that is being lazy-loaded. Placeholder images make it so your web page won’t shift every time a new image loads. To avoid these pitfalls, read Google’s best practices for lazy loading and so that you don’t accidentally create new problems while trying to improve your site.
Tips for Improving Crawling
Images rank just like pages do, so by making useful images and optimizing them properly, you can start to bring in organic traffic. But web crawlers have a harder time finding and understanding images because they can’t yet understand visuals. Instead, they rely on the data around those images. Use these tips to help build context around your images to help Googlebots understand and crawl your images better.
5. Add Descriptive Titles, Captions, Filenames, and Alt-Texts
When uploading an image on your website, you have the option to include a number of image details that have the benefit of helping crawlers and search engines understand your image. These details include:
- Image Title: An added title name that should describe what the image is in clear terms
- Caption: A description found below the image that adds context
- Filename: The name of the image file you are uploading
- Alt Text: Used to describe an image for people who are visually impaired
If possible, you should use each of these places as an opportunity to include relevant keywords for your image. However, you should always make sure that the keywords you include fit in naturally.
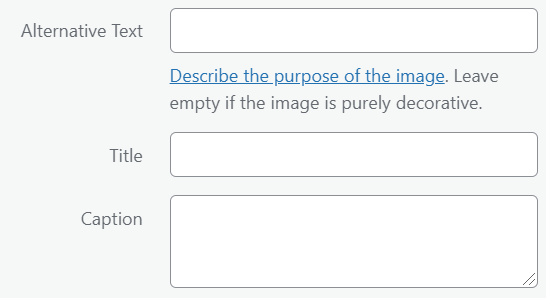
Adding these details will be different depending on your CMS, but it shouldn’t be too complicated. For example, with WordPress, just go to your Media Library, click on the image you want to edit, and then add the information on the appropriate lines.
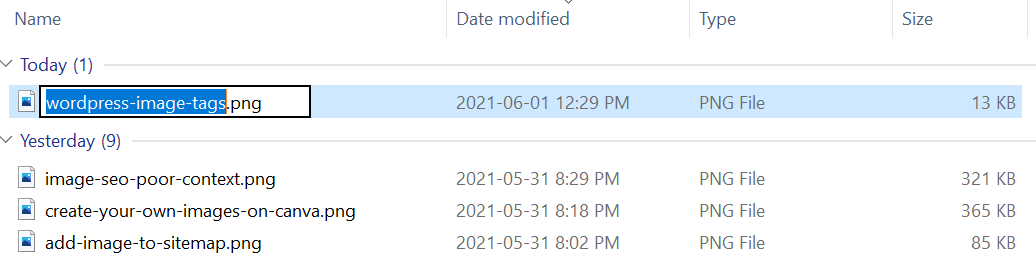
For image file names, simply find the image file on your computer, right-click, hit rename, and add a descriptive title with dashes (-) between each word.
Caption vs. Alt Text
The biggest difference between the two is that captions are visible on your published page, but alt text is not. Alt text describes your image to search engines, and some screen readers rely on it to make the image more accessible. The caption is usually right below your image and can add context or commentary to the image.
Although this seems relatively simple, a lot of people still have trouble getting it right. For example, this image of Everest from GQ magazine:

Image Title: N/A
Caption: The viral photograph, a prelude to Everest’s deadliest day in years. Nirmal Purja Project Possible Ltd.
File Name: mount-everest-gq-men-of-the-year-2019-lede.jpg
Alt Text: This image may contain Nature Mountain Peak Outdoors Mountain Range Human Person Snow Ice Sport and Sports
GQ does an okay job here, but there’s a lot of room for improvement. First, they’ve not included an image title, which, although not crucial, is a small missed opportunity. Second, their alt-text isn’t helpful for people who cannot see the image. Alt texts are designed to aid in web accessibility. Their first goal is to help people understand the image, and if a keyword is forced in there, it could be considered keyword stuffing by Google.
We should note (sheepishly) that SpyFu does not do a good job with alt text. Limitations in our existing blog platform don't allow for alt text additions. We really hope to make upgrades that correct this issue without tanking our blog structure. (Putting it out there into the universe...)
6. Plan Your Image File URL Structure
Every image you use on your website has a file URL structure so that when a user accesses your web page, the correct image files are fetched. Google recommends that you “organiz[e] your image content so that URLs are constructed logically” because Google looks at this file path to help it understand what is contained in the image.
Essentially, a file URL is the address of your image on the internet. Many image file URLs look like this:
https://images.theconversation.com/files/168121/original/file-20170505-1693-ymh4bc.jpg?ixlib=rb-1.1.0&q=45&auto=format&w=926&fit=clip
This is incredibly messy, and it might be hard for bots to understand what this image is about or that it is even an image at all.
Instead, it is better to clean up your file URLs so that they are more descriptive and it’s clear that they are images. For example, if you’re a website that sells shoes, you could categorize your 2021 Air Jordan image URL like this:
shoe-business.com/running/nike/2021airjordan.jpg
The URL contains keywords that would help Google understand the image, and it ends in a .jpg file extension, so it is clear that it is an image. With your own file URLs, it isn’t so important how you organize them, as long as you keep it consistent, so it’s easier for bots to find and rank the images on your site.
7. Add Images to Your Sitemap or Create an Image Sitemap
To make it as easy as possible for Googlebots to find your images and index them, you can include them on your current sitemap or create a unique image sitemap. Sitemaps help search engines by telling them what is on your website in one easily readable document. Generally, sitemaps are used for pages, but they can also be created for images, so crawlers know what images are on your site and where they are.
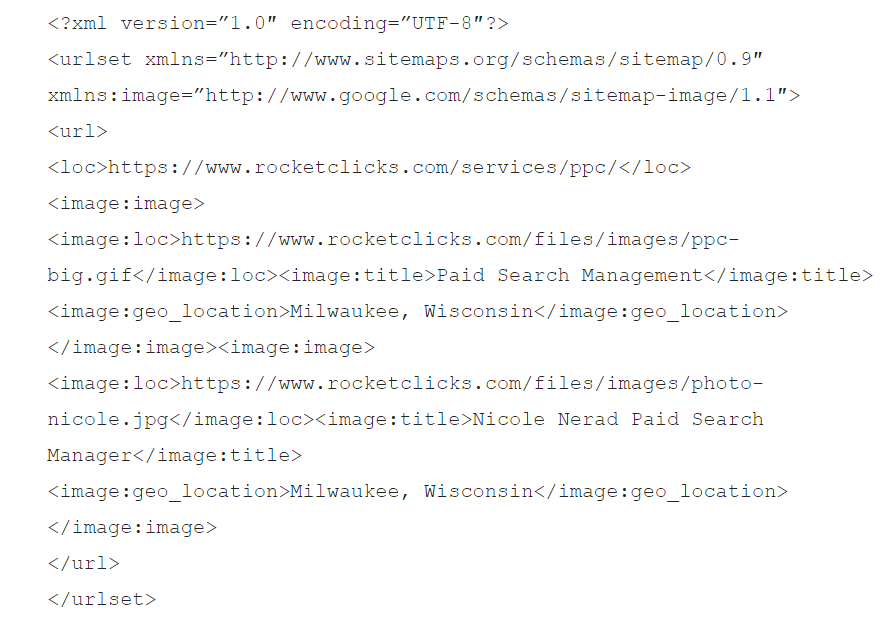
Usually, the best choice for most websites is to just make an independent image sitemap. This choice is generally better because when you add images to your existing sitemap, it requires you to edit your sitemap for every image you want to add. For example, adding two images to a single page on your sitemap could look like this:
Anyone whose website gets a lot of image traffic should instead create a unique image sitemap to save themselves some work. If you want to create an image sitemap yourself, you can follow this guide that will help you make one using the Screaming Frog tool. However, there are also plenty of other free online tools and plugins that can do the job for you if you aren’t confident enough to do it yourself.
Tips For Improving User Experience
Google wants to create a great user experience for its searchers. This means that images on your page can’t just look nice; they also need to play a valuable role in the content on your page. The more your images can help users get value from your site, the more Google will reward you, both in image results and page rankings.
8. Use Original and High-Quality Images
Anyone can download a stock image and add it to their website. Stock images or those from image warehouses are helpful in a pinch, but they aren’t going to be as engaging as something that is custom-made. When you make your own images, you can make sure that they are specific, having everything they need to complement the unique value your page is giving to readers.
When designing your own images, keep these key design features in mind:
- Use high-quality images with no blurriness
- Don’t put crucial information inside your images, as not everyone will be able to access them
- When in doubt, keep your images simple, clean, and purposeful
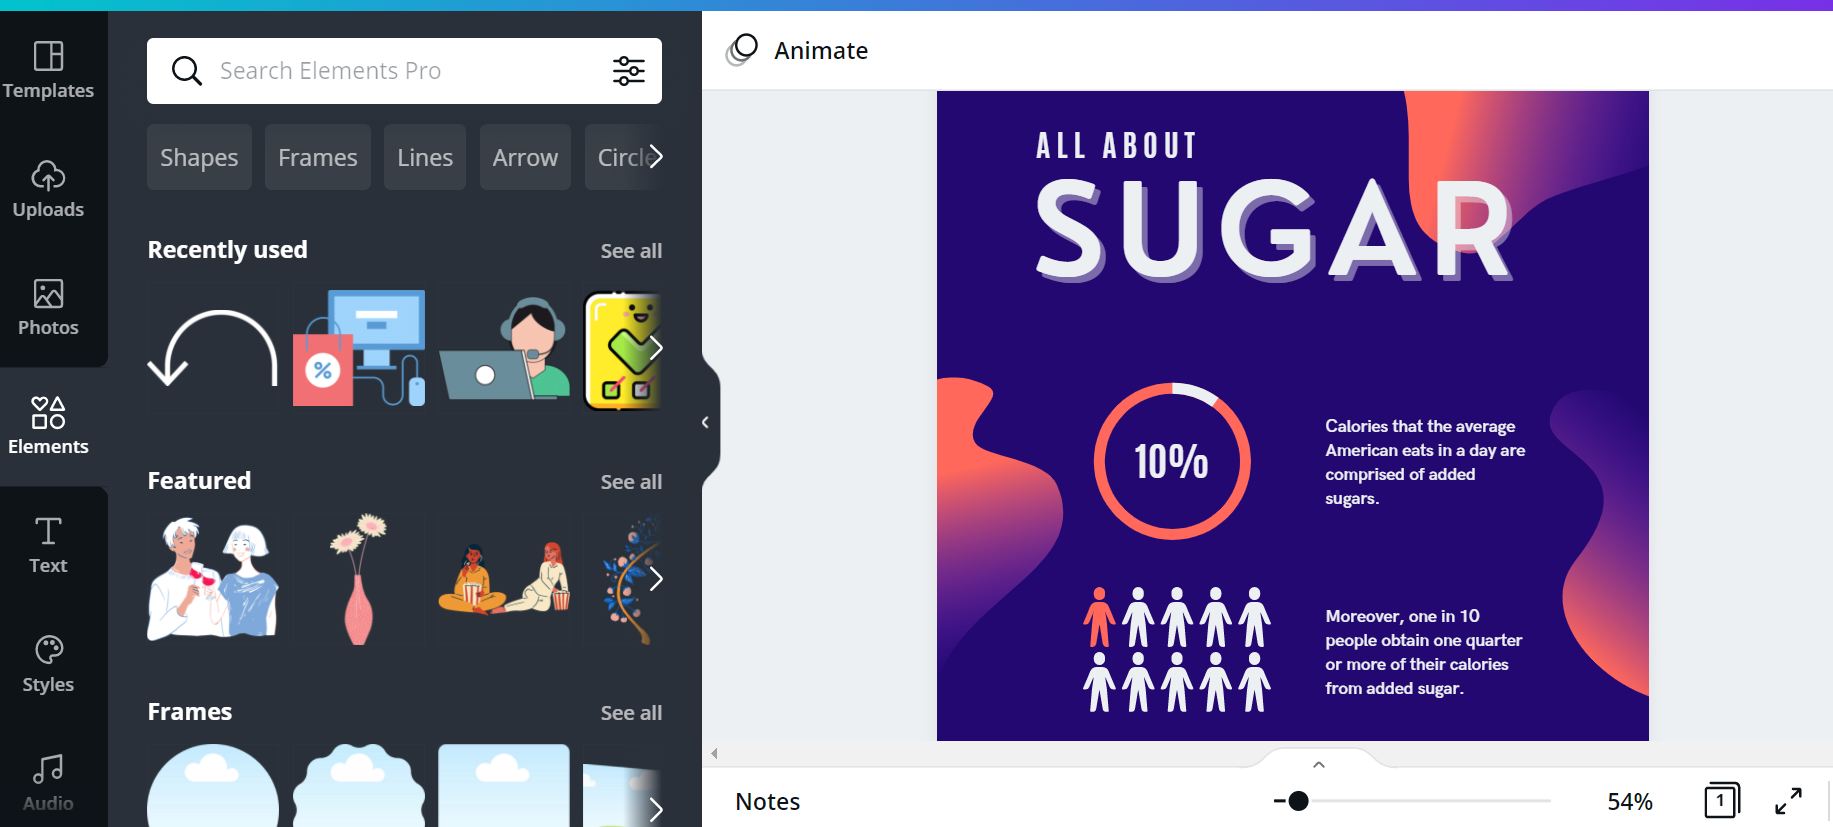
If you aren’t a photographer or designer, consider using a creative tool like Canva that makes it easy to drag and drop elements on ready-made templates.
If you’re considering taking over the graphic design for your website and have little experience, try taking a course to learn design basics. Websites like Udemy or videos on YouTube can help you get a grasp on how to make simple, powerful visuals for your website that will engage your readers.
All of that might be unrealistic considering your resources--both time, familiarity, and budget. If searching for images online is a better fit for you, consider some of these tips for advanced image search.
9. Create Context on Your Pages For Images
Images should complement the content around them and vice versa. Neither should be needed to properly understand the other, but they should be placed and discussed so that the two of them together give you a better understanding of each one. When done right, strong images couched in great text make for gripping content. Google can also look at that text around your image to better understand what the image is about, helping your image rank better too.
So how do you do this?
First, you want to prioritize your most important information and images at the top of the page. This improves searchability because users can find what they are looking for quicker. They will also see the quality and relevancy of your page, encouraging them to continue reading your work.
Second, you need to support your images by setting them up with your text. If you have a picture of the new Macbook Pro, then on either side of that image should be information discussing the MacBook Pro. This is an example of how not to set up an image with text.
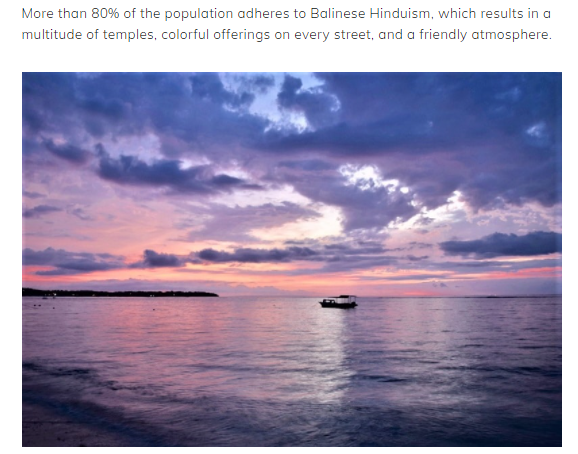
The image is fantastic, but the text preceding it is talking about “multitudes of temples” and street life in Bali. This beach scene image doesn’t fit the section’s context and should have been used elsewhere or cut altogether.
By supporting your images with relevant text, you help readers get more out of your articles and help bots understand your image better at the same time. It’s a small change, but it can help your images stand out and improve the quality of the work you produce.
10. Improve Overall Page Quality
When Google is considering images on your page, overall page quality is a ranking factor. When you improve the quality of the page, the images on your page will get a boost as well.
To improve the quality of your page, consider adding additional value to users in these ways:
- Better writing quality
- Original research, interviews, or expert insights
- In-depth analysis
- Easy-to-use interface
- Backlinks to authoritative sources
Page quality all comes down to value; any way you can add value to readers with your site is an opportunity to improve your page quality and image SEO. To make sure you are doing everything you can, consider reading our guide to E-A-T and our audit of on-page optimizations. Both of these resources can help you find ways to improve your site quality and create websites that users come back to time and time again.
Double Check How You’ve Done on Google Search Console
Google wants you to succeed in building a better page experience for users. To help you, they’ve created tests on Google Search Console that can audit your mobile usability, page speed, and core web vitals. These tests can be used to double-check a lot of the image optimizations we’ve outlined here so that your tweaks are helping you and your users, not causing problems on your site due to poor implementation. Learn how to find the insights you need to improve your website in our guide to Google Search Console.
