
You want to rank #1 on Google, but you’re not sure how or what to do. Discover the 12 steps On-Page SEO checklist on how to get ranked higher on Google.
The problem is that there are so many SEO experts out there who offer conflicting advice and it’s hard to know what works best.
Some say keyword density is important while others say it doesn’t matter at all.
All this information overload leads people into a rabbit hole of reading blog posts and watching YouTube videos without ever getting any real results.
To cater to this issue, I’ve created a checklist of the most important things you can do for your blog post in order to get ranked higher on Google – without wasting time or money on tactics that don’t work!
This blog post will take you through my on-Page SEO optimization step by step in the order of your content marketing workflow.
But before we do that, let’s try to understand:
What is On-Page SEO?
On-page SEO is the practice of optimizing individual web pages in order to improve a website’s search engine rankings.
Unlike off-page SEO, you’ve full control over it, so it’s advisable to hit hard on this for better results.
It’s fast, yet predictable.
However, this also has various elements too and all of these have to be optimized accordingly to get the best results. Moreover, knowing on-page SEO is one of the must-have marketing skills these days.
Wondering about what to optimize first? Follow our On-Page SEO checklist.
Table of Contents:
- Identifying The Keywords You Want To Target
- Page Title Tag
- Organize Page Structure
- Images
- Inter-link Your Pages
- Add Outgoing Links
- URL Slug
- Add Schema Markup Data
- Optimize your page speed
- Optimize for mobile responsiveness
- Write a click-worthy meta description
- Add open graph data (Bonus)
1. Identifying The Keywords You Want To Target
The first step in our On-Page SEO checklist is to identify the right keywords.
Keyword research is the process of identifying and analyzing the:
- Most relevant, and
- Easy to rank
keywords for your target customers.
The three most essential metrics you should always pay close attention to while doing keyword research are:
- Search volume (higher is better),
- Competition levels (lower is better), and
- Relevancy (higher is better)
By doing so, you can gain valuable insight into where your website or content should focus its efforts in order to achieve maximum visibility in search results.
In short, follow these 3 steps:
- Take a guess on what keywords you want to write on and put them in SEO tools like Ahrefs or Semrush
- Look for the above metrics and come up with a suitable keyword and its long tail and LSI variations.
- Create a content cluster, and write and optimize your articles with content optimization tools
- Optional: Use a keyword rank tracker to track your ranking progress
With keyword research done, the next step is to figure out your:
2. Page Title Tag
The second step in our On-Page SEO checklist is to optimize your page title.
A title (or H1) tag is an HTML element that specifies the title of a web page.
It is also used by search engines to display a page’s title in the SERPs and it also influences your CTR.
Note: Although the page title differs from the SERP/SEO title, if you don’t make any changes to the title settings, the page title will be used as the SERP title by default.

Make sure your page title is optimized for both SEO and humans since it’s the first encounter your post has with people searching for your target keyword in the SERPs.
Here’s how you should optimize it:
- Include your keywords in your titles but don’t overdo it
- Don’t have multiple titles tags on a single page, one’s enough
- Make sure to check your title isn’t getting stripped off in the SERPs with this free tool
- Use power words and copywriting techniques to improve your title CTR
- Don’t go for clickbaity titles
- Avoid all capital letters
- Be descriptive yet concise
- Focus on search intent
- Include your brand name at the end if you’re focused on branding
If you’re unsure of whether your title is catchy or not, you can take the help of these AI copywriting tools to aid you in this process.
These few basic tips will definitely help you write a good page title, but it’s not it.
We need to:
3. Organize Page Structure With Headings And Subheadings
The third step in our On-Page SEO checklist is to optimize your page structure.
By adding headings and subheadings (H1, H2, H3, H4) to your text, you can help readers easily organize the information on your page and quickly find the information that they are looking for.
Additionally, proper headings and subheadings can provide valuable cues to search engines, helping them to crawl your content more efficiently and understand the main themes within your content.
While writing for the web, it is important to incorporate clear headings and subheadings in order to maintain a strong on-page SEO structure.
You can also use this free WP plugin to link to different sections of your blog post.
So take the time to go through your text carefully, using heading tags appropriately and creating well-organized sections that both readers and search engines will appreciate!
Here’s how I structure my blog posts:
H1: Blog title
- Featured Image
- Blog introduction
H2: Subheaders
- Content
H3: Sub-Subheaders
- Content
FAQ Section
Conclusion
CTA
The structure looks perfect, isn’t it?
Are you sure we aren’t missing anything?
Oh God, we forgot to add and optimize the:
4. Images
The fourth step in our On-Page SEO checklist is to optimize your images.
The goal of image SEO is to improve an image’s position in image search results.
Moreover, it adds visual appeal to your pages making them more readable and aids in faster indexing as well.
Some individuals may believe that image SEO is a waste of time, but it can be quite important.
After all, a high-ranking picture is more likely to be clicked than a low-ranking one, which will result in the user being directed to the page where the picture is hosted aka your page.
Here’s how to optimize your images for SEO:
Always compress your images
Compressing images does two benefits:
- It lowers your file size and saves you disk storage space
- Decreases page load times
Add descriptive alt-text
Adding keyword-rich descriptions, also known as alt text helps search engines understand what your images are about.
In addition, adding alt text can also help to improve the accessibility of your website by providing a text-based description of your images for those who are visually impaired.
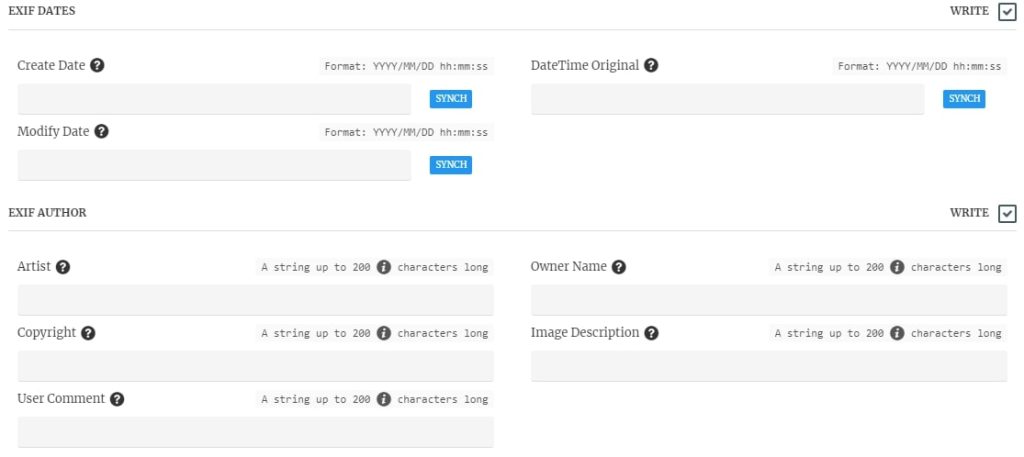
Don’t forget to add EXIF data
EXIF image data is a set of information that is embedded in digital photos.
This data can include the:
- date and time the photo was taken,
- author of the image,
- camera settings that were used, and
- the GPS coordinates of where the photo was taken
You can add more properties like these by using this free tool here.
While this information might not seem important, it can actually be very useful for image SEO.
Adding EXIF image data to your photos can help them to rank higher in search results.
This is because search engines can use this data to determine what the photo is about (can match GPS coordinates with the place that image was taken) and how relevant it is to the user’s query.
Now that your images are optimized for SEO, let’s:
5. Inter-link Your Pages
The fifth step in our On-Page SEO checklist is to optimize the internal links.
When you interlink pages, you provide links from one page on your site to another.
This not only helps users navigate your site more easily but also tells search engines that your site is active and relevant and doing this helps with faster indexing.
By linking to other pages on your site with keyword-rich anchor text, you can tell search engines what those pages are about and improve your chances of ranking for those keywords.
But that doesn’t mean you should inter-link every now and then. Here’s how to do it effectively:
Whenever linking from one page to another, always ask these 2 questions:
- Is the anchor text relevant and keyword-rich?
- Are you linking from/to a relevant page?
Here’s how internal link looks like:

Google crawls all the links and focuses on the anchor text you’re using. If the anchor text is in conflict with the content piece you’re linking to, chances are you might get penalized.
Ex. a link from a page titled “On-Page SEO” to a page titled “Off-Page SEO” is valid and accepted but not to a page titled in an entirely different space like “Sales strategy”.
Since we have successfully done inter-linking, how can we forget to:
6. Add Outgoing Links
The sixth step in our On-Page SEO checklist is to optimize the outbound links.
Adding outgoing links to your website can be a great way to improve your SEO.
By linking to other websites, you give search engines a way to discover new content and pages on your site.
In addition, outgoing links can also help to build relationships with other websites and create opportunities for guest blogging and link-sharing.
However, it’s important to use outgoing links judiciously, as too many links can be perceived as spammy by search engines.
When adding outgoing links to your website, be sure to choose high-quality websites that are relevant to your niche or industry.

Also, be sure to add links sparingly, so as not to overwhelm your readers or turn off search engine crawlers.
The process of adding outgoing links is similar to the above.
Whenever linking out to another site, always ask these 2 questions:
- Is the anchor text relevant and keyword-rich?
- Are you linking from/to a relevant and authoritative source of content?
With six on-page SEO factors optimized, let’s proceed to optimize a very important element which is your:
7. URL Slug
The seventh step in our on-page SEO checklist is to optimize your URL.
The URL slug is the part of the URL following the last backslash. For example, the article you’re reading now has a URL that looks like this:
https://mention.com/en/blog/on-page-seo-checklist/
The slug is: “on-page-seo-checklist”
In the SERPs, it looks like:

According to Google, the URL slug:
- Helps their algorithms understand what the article is about,
- Aids with faster and more efficient indexing,
- Maintain your site structure, and
- Improves your SEO rankings
To optimize your URL Slug for search engines, follow these few basic tips:
Use keywords in your URL Slug
Always include your keywords in your URL slug as it helps search engines understand what the content is about and index your page effectively.
Moreover, your URL slug also influences your CTR in the SERPs.
Keep your URL Slug short and sweet
Long and messy URL slugs:
- Are difficult for users and search engines to read and understand
- Appear spammy
Aim for a URL Slug that’s no more than 3-5 words long.
Use dashes (-) to separate words in your URL Slug
Using dashes makes it easier for users and search engines to read and understand your URL slug, and it also helps search engines index your pages more effectively.
Avoid uppercase letters, dates, and numbers
The URL slug should always be in lowercase letters so that Google can easily read it.
Additionally, you should avoid using
- Dates,
- Symbols, and
- Numbers
in your URL slug as they can make your page appear dated and may confuse Google about the freshness of your content.
Use HTTPS
The use of HTTPS in your URL slug will indicate to Google that your site is secure and reliable.
Encrypting your site with an SSL certificate also increases user trust by allowing visitors to securely submit sensitive information such as credit card numbers and login passwords.
Don’t go beyond 2 nested directories
Going beyond 2 nested HTML directories is not recommended since it degrades the page fetching speed and slows down your site.
It also raises the URL length, which is in direct conflict with keeping your URLs short.
Congrats, your URL slug is complete, now let’s move on to:
8. Add Schema Markup Data
The eighth step in our on-page SEO checklist is to add structured data on your page.
Schema markup is code that you can add to your website to help search engines understand your content better.
This can be helpful for things like:
- articles,
- recipes,
- reviews,
- events, etc.
Adding schema markup to your website can help your content appear more prominently in search results (see below), which can lead to a higher CTR and more traffic to your site.
A few examples of how few schemas appear in the SERPS are:
Recipe Schema

Review Snippet

How-To Schema

Adding these schemas is simple and if you’re hosted on WordPress, you can try this free plugin to aid you with it.
Since you’ve added a ton of the above parameters to your web page, chances are your page size might increase and slow down your site.
To overcome that, you need to:
9. Optimize your page speed
The ninth step in our on-page SEO checklist is to optimize your page speed.
Google has stated publicly that page speed is a factor in their ranking algorithm, so it’s clearly important.
But what’s that BTW?
Page speed is essentially the amount of time it takes for a web page to load.
The faster the better, of course.
There are a number of factors that can affect page speed, from the size of your images to the code on your website. Fortunately, there are also a number of ways to improve it.
The simplest ones include:
- using a lightweight theme with optimized code,
- using a fast web host,
- reducing the number of HTTP requests,
- using animation free elements,
- compressing images, and
- using a content delivery network (CDN)
You’ll be more likely to decrease your load times, which not only provides a great user experience but also improves your ranks if you implement the above measures to enhance your page speed.
To check your page speed, try this free tool.
Here’s how the results look like:

10. Optimize for mobile responsiveness
The tenth step in our on-page SEO checklist is to optimize your page for mobile.
In today’s world, more people are using their smartphones and tablets to access the internet than ever before thus Google is also prioritizing this as a ranking factor.
There are a few different ways to make your website mobile responsive, but one of the easiest is to use a responsive theme.
With a responsive theme, your website will automatically adjust to fit whatever screen size it’s being viewed on.
This ensures that your content is always easy to read and navigate, no matter what device your visitors are using.
To check if your website is using a responsive design, try this Google Mobile-Friendly Test tool.
Simply enter your website’s URL and Google will analyze your page to see if it is mobile-friendly.
Here’s what you can expect if your page is mobile-friendly:

If it is not, you will need to look for a responsive theme.
11. Write a click-worthy meta description
The eleventh step in our on-page SEO checklist is to optimize your meta description.
A meta description is the short description of your page present below the page title in the SERPs.
It looks like this:

A great meta description can mean the difference between a click and a bounce.
That’s why it’s so important to take the time to write a meta description that accurately reflects the content of your page and encourages users to click through to your site.
If you’re using Yoast SEO plugin, you can adjust and tweak your URL slug, meta description, SEO title all in the same place. Here’s where you’ll find the settings:

Here are a few tips for writing an effective meta description:
Keep it under 155 characters: This is the maximum number of characters that will be displayed in search results, so make sure your meta description is concise and to the point.
Use keywords wisely: Include relevant keywords in your meta description, but don’t stuff them in there. A few well-placed keywords will help improve your click-through rate without making your description sound spammy.
Focus on benefits: What benefit will users get by clicking through to your site? Be sure to highlight this in your meta description.
By following these tips, you can write a meta description that encourages users to click through to your site, helping you achieve a better ranking in search results. If you struggle with writing decent meta descriptions (it does take a bit of practice to master this skill) you may consider using Jasper AI to write them for you, since that tool has a meta description template that works for pretty much all niches.
12. Add open graph data (BONUS)
The last step in our on-page SEO checklist is to add OG data.
Open graph data is a piece of code that tells social media platforms like Facebook and Twitter what information to display when someone shares your blog link on their platform. This structured markup gives you an opportuinity to control the view of your content without additional modern data stack.
Without open graph data, your content might not look very appealing when it’s shared there, which could hurt your chances of getting more clicks on the platform.
Since, Google also uses social signals to determine your rankings, adding open graph data might act as a catalyst for driving more traffic.
Fortunately, adding open graph data is relatively simple if you’re using SEO plugins like Yoast or Rankmath.
Here’s how it looks in Yoast in the Social tab:

Conclusion
Now that you know all the on-page SEO factors that you need to take into account in order to rank #1 on Google, it’s time to put them into practice.
Implementing all of these ranking factors may seem like a lot of work, but the payoff is worth it.
Not only will you be able to drive more traffic to your website, but you’ll also see an increase in conversions and leads.
To summarize, follow the below list in the exact order:
- Conduct keyword research: Focus on higher search volume and low competition
- Create an SEO optimized yet catchy title tag
- Structure your posts with headings and subheadings
- Add and optimize images for SEO and visual appeal
- Add internal and external links
- Crafts a short and keyword-rich URL slug
- Add schema markup
- Optimize for speed and mobile responsiveness
- Add open graph data
This checklist will help you make sure you’ve covered all your bases.